Pork Loin ‘Roast’

Farmer hates roasts. Of any kind, if it’s prepared like a typical ‘roast’. So I turned to my lovely Women in Agriculture group on facebook for some new ideas on how to prepare them! I’ve done this with beef roasts, pork top loin chops, and pork roasts. The pork loin cooks up the best to me, but I still love the others too!

Ingredients:
3# Roast
Butter
Seasoning/Rub of your choosing

Directions:
Preheat oven to 400*
Pat dry your roast, and rub down with your seasoning, this time I used a Smoky Applewood Rub.

image

Place on a baking sheet or broiler pan fattier side up, or bone side down. *You can line it with tin foil to make clean up easier!
Top with some butter to keep it from drying out. *You can also cover with tin foil, but I love the crispy parts it gets on the ends, so I just keep adding butter!

image

If completely thawed cooking times should be about and hour in a half to two hours if at around 400*. You can also do the low and slow method at 325-350 which will add a little more than an hour or so to your cooking time.
If partially frozen cooking time will be 2 in a half to 3 in a half hours.
About halfway through cooking I make sure to add more butter to the top!

image

Cut into the thickest part and make sure there’s no pink left.

image

Slice into hunks, and enjoy!

image

image

image

Farmer loves mashed potatoes with this dish, but roasted red potatoes would be a great side to this as well!
This is quickly becoming a favorite of ours! Let me know what you think!

Courtney
~A Dairyman’s Wife

Chicken Paprikash

An old time favorite. And Farmers favorite meal. I had high standards to meet with this meal, we all have those meals that our mommas make the best of, so we spend our whole lives comparing that dish to theirs when someone else makes it. I’m pretty proud to say that I exceeded Farmers expectations with this, and it is his favorite. Although, I’m not allowed to make it too often because he says he always eats way too much of it. 😉 This is a meal that will stick to your bones, so invite your too skinny friends over and feed them right!

There are SO many ways to make Chicken Paprikash, whether you make it soupy or thick is up to you. I make mine pretty thick. But you can play with amounts of sour cream, water and flour if you want to adjust the consistency of it. This dish always amazes everyone, you think because of the way it tastes, that it’s going to take a lot of work, but it’s so easy. You’ll read the directions and think ‘That’s it?’ The answer is, Yes. That is really all there is to it.

Feeds 8, This recipe will feed Farmer, MUS, and myself for dinner and Farmer will have plenty of leftovers for At least 3 meals following.

Ingredients:
3-5 – Chicken breasts shredded (bone in tastes better, but you obviously get more meat from boneless, that is up to you. I change depending on what’s on sale that week)
4.5 #’s of Sour Cream (so gross sounding, I know. But trust me if you like it thick that’s your secret ingredient)

image

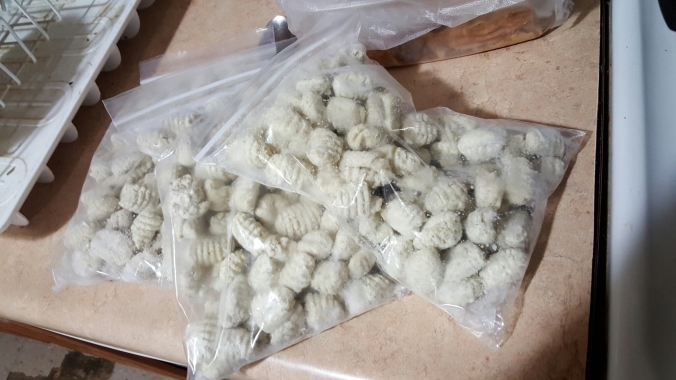
2 #’s Dumplings, Spaetzle*(recipe added to the bottom of page for homemade), Gnocchi (depending on how I feel I will either make my own spaetzle/Dumplings or just buy the gnocchi from the store. Gnocchi is a potato based dumpling, whereas spaetzle is egg & flour based)

image

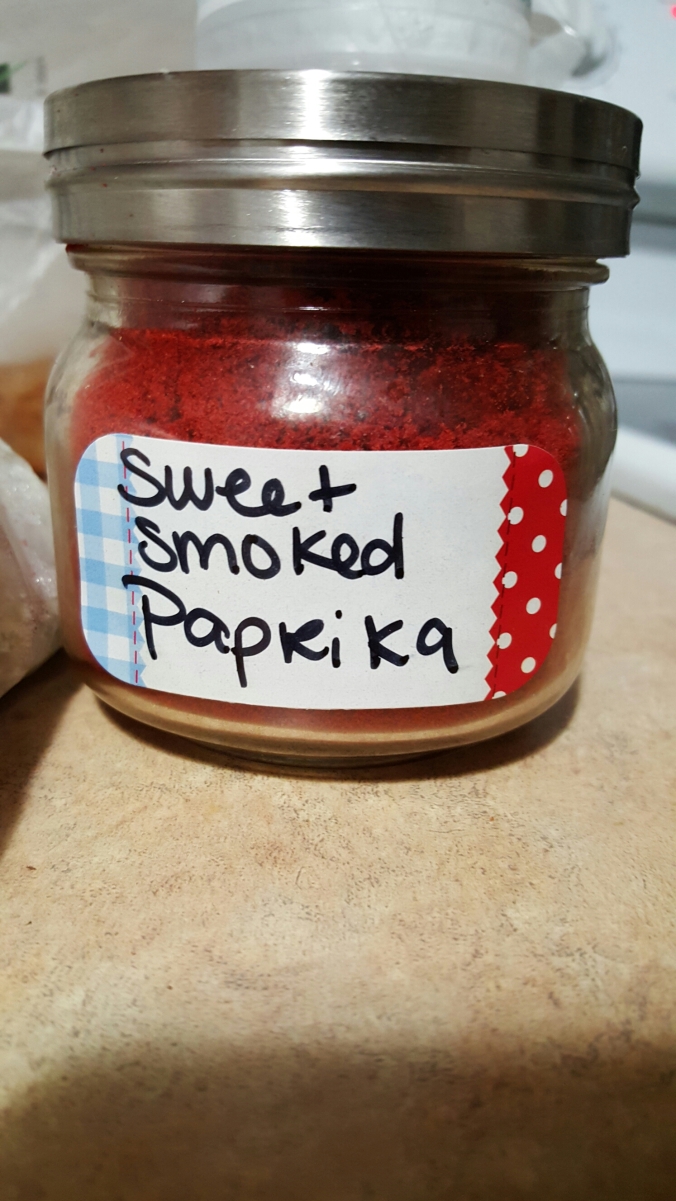
Paprika to taste

image

Salt & Pepper to taste
1/4 cup water, as needed per consistency liking
1/4 cup flour, as needed per consistency liking

Directions:
Precook your chicken, and shred into a good sized pot
Boil your water and a little of salt, add in your dumpling dough, or gnocchi. Once they are floating on top (about 3-5 minutes DON’T OVER COOK) spoon out and add to pot with chicken

image

image

Add in your sour cream to your chicken and dumplings
Keep that pan on medium high heat
Add in your paprkia, salt and pepper taste

image

I add until most of that sour cream taste is gone, a good orange/red color and visible pepper flakes is how we like ours

image

Heat throughout entire pan, stirring occasionally, or as it bubbles slightly
When it starts bubbling in the center or getting hot spots is how I normally knows it’s done

image

The sour cream should be a smooth stew like consistency for the way we eat it (as it cools and sits this will thicken back up, so keep that in mind when adding water or flour to thin or thicken it)

Enjoy, this dish is a family and friend favorite, and like I said, you know you ate something, because it sure sticks to you

Paprikash is just a big taste test, as we have found there are many different types of paprika. Recently I have found my favorite to be a sweet smoked type, it just gave the Paprikash something different. Farmer doesn’t like the traditional Hungarian Paprika, it has a sweeter flavor to it. We normally buy the paprika from Aldi’s and that seems to be farmers favorite type.

Homemade Spaetzle/Dumplings
I don’t have a spaetzle maker, but it’s definitely not needed, here is my favorite recipe for Dumplings, and it’s super quick!

Ingredients:
4 eggs
3 cups water
6 cups all purpose flour
1 tsp salt

Directions:
Bring a large pot of water to a boil.
In a big bowl combine eggs,water and flour and salt. Mix together to form a soupy dough. 
When water is boiling, scrape the dough into the water a spoonful at a time. This is easier if you dip the spoon onto the boiling water,so the dough will not stick to the spoon. 
After you scrape the dough into the boiling water, they should cook for about 7 minutes. When they rise to the surface, they are done. 
Drain and rinse.

Enjoy everyone!

~Courtney
A Dairyman’s Wife

Why loving a Farmer is so easy

I’m feeling sentimental lately, has to be due to the hormones of this pregnancy. But they are just a rise of what’s already felt right? I follow this awesome group of women on facebook, and earlier today one woman asked ‘What does your man do, to make your life better?’ This really, really got me thinking. Some woman replied that their husbands help with house chores, or cook them dinner, or always help with the kids. Others answered that theirs didn’t complain about no-income livestock  (horses) No matter what the answer you had to smile at the replies, because you know there was a smile behind it.
Farm life is difficult. It’s long hours, a lot of times for little reward. It’s pulling an all nighter with a sick baby calf, feeding it and medicating, just to have it die the next day. It’s not knowing when your Farmer will be home for dinner, or even at all that night. Having plans for a date that you haven’t had in two months, to have the cows get out, or have to mow hay because it’s finally dry enough. Or go to countless weddings or birthday parties alone. But, you know what? I wouldn’t have it any other way. I would not trade my life here, for anything. Through all the struggles and hardships, there are so many beautiful moments to be shared, and not every woman is lucky enough to be able to love a man who can give her that.

1. He has the patience of a saint.
Well most of the time that is. He has to sit through field after field after field, twice a year in a tractor cab, for countless hours on end. Some are lucky to have heat, air and the radio. Others not as much. He works with stubborn animals 3 times his size, and befriends every single one of them. It’s not easy when you have a crazy heifer, who everytime she walks in the parlor for the first month or two wants nothing more than to run you down and break your arm.

2. The amount of compassion he has.
This goes along with point number one some. It’s a beautiful thing to see a man care for a calf as if it was his own child. To talk to them, pet them and know each and everyone’s personality and favorite scratchin’ spots. To see him upset when you lose one, not just because it’s profit loss, but it is the loss of a sweet little life. Not just calves, but any animal that crosses his path he genuinely cares for.

image

3. He’s an incredibly hard worker.
This one kind of goes without saying, but it’s a blessing and a curse. He puts in long hours, sleepless nights, and his blood, sweat and tears, just for his family to have a better life. And to make the farm something better than it already is.

4. Tractor dates are actually pretty awesome.
The cab of a tractor is not roomy. So it forces you to be close. And, unless you have a little one toting along, it’s guaranteed alone time! I enjoy the nights I spend with him in the tractor cab. I always learn so much, and it’s nice to have a slow down with just the two of us making round after round. Plus Farmer likes it because he’s getting work done! Also have you ever seen the sunset from the cab of a tractor? It can be pretty breathtaking.

image

5. He is great with money and finances.
Money will always be a hot topic on the farm. Whether it’s being made, spent or lost. Money is going to be talked about. When steers are high corn is low, or the drought is killing the only profit to be made this year. Money makes the farm go ’round, as well as hard work ;). Farmers not only understand interest, how hard it can be to come by or how easy it goes out the door, they understand the importance of good records and financials. Which is good for me, because I personally am horrible at budgeting, Farmer is great, for that I am ever thankful. He can also make money appear of out thin air when it’s really needed. I swear, I’ve been a witness.

6. Sometimes, him missing out on an event isn’t all that bad.
Especially when YOU don’t want to go to said event. The farm is such a great excuse for not going somewhere. You don’t have to feel bad either, because you know it’s not a lie when you say you maybe too busy to go to somewhere.

7. He’s not clingy.
He can’t be! His life revolves around farming. So you are able to live your life too. Whether it’s hobbies, or girls nights, or just being by yourself for a little bit. He’s going to be okay with it.

8. He’s able to look into the future, and not be afraid to talk about it.
A Farmer has to be able to prospect out weeks, months and sometimes years into the future for plans, and stick with them. He’s not afraid to talk future and plan it out with you. He’s also generally pretty stable. He can’t just pick up and leave.

9. You share a way of life together not everyone gets to experience.
Actually, a very small portion of the population get to experience this kind of life. Not every woman can climb in the tractor cab with her sweetie on a Friday night. She doesn’t get to come home to 20 bellering calves waiting to see you. Not everyone gets to witness a new life being born, and knowing you have something to do with it. To watch the next generation look up to their Farmer dad, and know he’s a hard worker, and want to follow in his footsteps. That’s pretty special to see.

image

image

Farm life is hard. Being a farm wife, and mom can prove to be harder. But there is nothing that I would change my way of living for. I know I’m lucky to have my farmer. While sometimes it’s hard. It’s always pretty easy to love him.

What reasons does your Farmer make it easy to love him? Leave the in the comments!

~ Courtney
A Dairyman’s Wife

Chicken Lasagna

It’s been hectic lately here at the farm and the mill! Getting ready for several fairs for work as well as getting my little sister ready for her first fair year having an animal, (she’s taking one of our feeder calves.) But I am back. Farmer absolutely loves this dinner. I definitely don’t hate it either. Gives a nice twist on lasagna.

Ingredients:
3-4 – Chicken Boneless Chicken Breasts (precooked & shredded)
Lasagna Noodles
3 – Jars Alfredo Sauce (you can absolutely make your own, which I have done, but it is more time consuming.)
1 – Bag Frozen Peas
1 c. – Breadcrumbs – I use Italian, but any flavor will work *optional
1 c. – Parmesan Cheese *optional

Directions:
Preheat your oven to 400*
Cook your chicken ahead of time to allow it to cool some so you can shred it.
You can precook your noodles of you like, I normally opt out of this as long as I have enough Alfredo sauce to cover my noodles nicely. Saves time!
Shred chicken in a bowl

image

Add your bag of frozen peas and 1-1 1/2 jars of alfredo sauce mix together and set aside.

image

Pour a layer of Alfredo sauce on the bottom of a 9×13 casserole dish (about 1/2 of a jar)

image

Layer with your lasagna noodles, I usually use 4 per layer
Add half your mixture of chicken/peas and sauce to the top and spread evenly

image

Layer 4 more lasagna noodles and top again with your mixture
Layer once more with noodles and top with remaining sauce

image

You want a nice thick layer that way your noodles aren’t crunchy.
Top with breadcrumbs and Parmesan cheese if you are using and stick it in the oven for about 35-40 minutes, or until edges are golden or bubbly.

image

image

Take it out and enjoy!
I love casserole type dishes of any kind. So I was super happy and excited to find this alternative, because I love lasagna. I hope you all have had a great summer and enjoy this dish!

I love any feed back, and would love to hear some of your favorite recipes!

Courtney
A Dairymans Wife

Moving Day

Moving day as I’ll call it, is where Farmer and Brother Ben(Farmers ‘baby’ brother) and sometimes MUS(man upstairs for you newbies) move around cattle on the farm. Normally when it’s just calves moving from their hutches to either under the barn or in the Watermelon barn (this is one of those tarp top barns, the tarp is green and the ends are red, so it looks like a half slice of watermelon turned upside down) Farmer and I do it by ourselves. But when it’s time for the 350+ calves we call in Brother Ben for assistance. Moving day isn’t really just ‘one’ day, we move them all the time as we see fit or as need arises. Here we have 5 stages of housing for heifers, and 4 for steers. 1. Calf hutches 2. Under the barn or watermelon depending on where we have the oldest calves that can be moved to the next stage. 3. This is where we separate heifers and steers, heifers go to the “little” heifer pen and steers go in the lean 4. Heifers get moved to big heifer pen, and steers get moved to the big steer pen. 5. Heifers get “kicked out” with the cows in the barnyard and pasture to be bred by our bulls. All newborn babies go in hutches and once they are around 2-4 months old (depending on calf size) they get moved to stage two. Stage 2 lasts until they are 6-8 months old, again depending on calf sizes and need for  space. Stage 3 lasts the longest of them all for the heifers, they stay in the “little” pen until they are normally a year in a half or so old. Stage 3 for the steers lasts until they are a year or a little better, sizing is big here and depending on if we have a lot of space in the big steer pen or not. Stage 4 for heifers lasts as long as Farmer sees fit, my Annabelle was recently moved here and within two or three weeks she was already out with the cows! This is completely size based, if they are big enough to breed they are out. Stage 4 for the steers is their final stage and they are kept here for sometimes up to a year, depending on size and need for extra cash around the farm. Stage 5 for heifers is where they eventually become cows and live out their ‘hopefully’ long happy lives. Moving days are always an adventure, remember ladies “Never take personally what he says when moving cattle” I’ve seen that on a few sights and it’s so true! Until next time.

Courtney
A Dairymans Wife

image

image

image

image

image

image

image

image

image

Oven Baked Steak

I will be the first to admit it, but I am HORRIBLE at grilling. Farmer Will be the second to admit that. We received my grandpa’s charcoal grill last year after he bought a new one. I figured “Oh no biggie I can do this” I was wrong. It was all burnt or under cooked. So I haven’t touched it since. I wanted steaks a few months ago during the winter time and was wondering of other ways to cook them. So Pinterest being the new best friend of our generation I looked there. I came across oven made steaks. We will NEVER go back to grilling or cooking steaks any other way. Farmer tells me every time I make them, that it’s the best steak he’s ever had. It’s pretty simple and not time consuming in the slightest. Depending on how you take your steaks it can take 10 minutes to 25 or 30 minutes.

Items you Need:

Cast Iron Skillet (or a good frying pan)

Broiler Pan Set

Tongs

Ingredients:

Steaks (How ever many for as many as you are serving)

1 – Stick Butter

Any kind of Seasoning you desire, (Farmer and MUS make fun of me because I can’t come home from the store without a new seasoning of some sort. It’s an addiction. We have an entire cabinet filled with different seasonings. I love experimenting so I never truly have the same thing twice. Always different amounts of seasonings and different kinds. My current favorites are the new McCormick’s Grill Mates Seasonings. As well as Hi Mountain Venison Rub. A customer at the store let me try this, and I’ve loved it ever since.)PART_1436543277094_20150709_203059

Directions:

Thaw out your steaks if you are using frozen ones.

Preheat your oven to 350.

Take your frying pan and put a chunk of butter in it and turn the heat to medium/high. Let the butter melt and sizzle.PART_1436543278104_20150709_203406

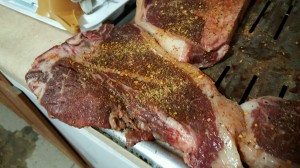
While you’re waiting for the butter to melt, rub down both sides of your steaks with whatever spices you decide you use. I love adding some brown sugar to whatever spices I use, because I love the caramelizing that happens when you bake it.PART_1436543279134_20150709_203511

Lay your steak down flat as you can in your frying pan of melted butter and let it get browned, per side this takes about 2 1/2 – 5 minutes. Continue to do this with all your steaks and adding butter as needed.PART_1436543280096_20150709_203710

Once all of your steaks are done lay them all flat on the broiler pan, and add some butter to the top of each steak.PART_1436543281120_20150709_205046

Put them in the oven for as long as you want. We like ours with just a thin line of pink in the middle so this takes about 10 – 15 minutes with our oven.

Here is a great visionary of how to tell how done your steaks are without a meat thermometer.170

Like I stated earlier, this is now our favorite way to make steaks. Farmer can be a particular man with how his food is cooked, so it’s a compliment that he loves these!

I hope you enjoy this recipe as much as we have! Let me know what you think is the best way to cook a steak! Grilling or in the Oven after you’ve tried this!PART_1436544488168_20150709_210023This meal was also Purrl approved. She’s our rescue kitten, who has identity issues and thinks she’s human. 😉 She sat at the table waiting for her share.

Courtney

A Dairyman’s Wife

Farm Tours

Farmer was born into a farming family. Cows, show horses and grain farming. I am the only one on my side of the family that lives on a farm. So with that being said, a lot of my family, younger cousins that are more like nieces and nephews have come out to visit with their parents the past few months to see what it’s like. It’s something I really take pride in doing as well as enjoy doing. I love helping to educate the younger generation on more than what they see on T.V. or hear in school. They all love going to the fairs and seeing the animals there, but we know how much different that is. It’s clean, animals are penned up, faced away from you, touching and petting isn’t promoted or allowed, and there really isn’t anyone there to answer any questions little ones, or even parents have to ask. Farm tours, with the calves, cows, steers and tractors is something I want to expand beyond family. Hopefully one day introduce it into a daycare or elementary school and have actual field trips out to the farm so that children who don’t have the connections can experience and have a day to learn what happens out of their direct line of sight.

Here are a few pictures from the tours I have been able to do!

PART_1436392683197_20150503_145853PART_1436392679856_20150503_144742PART_1436392681348_20150503_14523311159558_10153774127538047_5569644697053359578_n11083664_10153774129108047_427038780830132409_n13851_10153774129233047_4033998785923821586_n1484086_10153774129598047_2423045485253805818_n10464302_10153774126453047_4093371506933353457_n10457560_10153691554093047_537662664778155988_n10985226_10153774128023047_7265665065851214871_n10997483_10153691554163047_8357761648819280436_n11659462_10205977776917379_8499969697821726669_n11694972_10205977776597371_559107978304366259_nPART_1436392623472_20150529_082716PART_1436392626774_20150606_204836PART_1436392444347_20150630_194242PART_1436392443119_20150630_19423711206013_10206650657963759_1277259538078060553_nPART_1436392397105_20150703_194035PART_1436392440347_20150630_194104

Courtney

A Dairyman’s Wife

Spaghetti Bread

I figured I’d post my most popular and asked for meal. Spaghetti Bread. Looks complicated , impresses guests and tastes amazing. All it is, is spaghetti baked into garlic bread, plus a lot of cheese, and I LOVE cheese. This is a messy dish, prep wise, but so worth it. When I make this I made three loaves. Which works well because the bread dough that you’ll be buying comes in packs of three.

So if you aren’t feeding ‘An Army’ three loaves will feed 4-8 people roughly depending on the sizing you cut the loaves in.

Ingredients:

1 – 3 pack of Rhodes White Bread Dough (Use the white bread, I’ve used the Wheat as well as generic, and none of them hold up to what we are doing with it.)

2 – Jars of your favorite Spaghetti Sauce. I love Prego sauce personally

1 – Package of Spaghetti Noodles

1 1/2 #’s – of Ground Hamburger/Sausage – You can use both, or one or the other

3 – Small Blocks of cheese cubed.

1 – Package of Shredded Cheese

1 – Stick of Butter

1 – tablespoon of minced garlic

1- tablespoon of Italian, pizza etc seasoning of your choice

Flour

Directions:

The morning you want to make this, take the bread out of the freezer and place the loaves on a greased pan, spray some saran wrap as well and place that on top of the dough. Depending on what time you make and eat dinner you have two options to thaw your bread, you can either 1.) Thaw it the fast way on just leave it on the stove top all day, this takes roughly 4-6 hours, or 2.) You can let it thaw and rise in the fridge, which takes 8-10 hours. I normally just let it on the stove top all day and it’s ready by the time I get home. *Note: During the summer when it’s hotter it may over expand, I’ve run into this a lot. No biggie, just makes it a little harder to work with.

Cook your spaghetti noodles as the package states. Drain it and set it aside.

Brown your meat that you are using, then combine it with your two jars of spaghetti sauce.

Combine your spaghetti noodles and meat/sauce mixture together in a big bowl and set it aside.

PART_1436306213266_20150613_220213

Cut up your block of cheese

Preheat your oven to 450

Once your dough is thawed and has risen put some flour down on your table and set out your first thing of dough on the flour. Get your rolling pin and roll it out nice and flat.

PART_1436306212157_20150613_220206

Cut slits in the sides of the dough down both longer sides of in, about a fingers length deep, and two finger lengths wide.

PART_1436306216227_20150613_220326

Line the center with your spaghetti

Place about 1/3 of the block of cheese on top of your spaghetti

PART_1436306215219_20150613_220440

Fold the first end of your dough over and then braid the dough until you have about 3 or 4 lengths left at the end, fold that end over and braid the remaining pieces.

PART_1436306217259_20150613_220909

Melt your butter and add in the minced garlic as well as the seasonings and spread over top of your braided bread. You can also top with shredded cheese here as well.

Place on a greased cookie sheet, and cook until the bread is done, usually about 17-20 minutes

Continue this process with the last two loaves of bread. I just keep adding the breads as I’m done with them and keeping track of times I put them in and checking them to see how they look. When they are nice and golden brown they are ready.

10660323_10204674566882717_6456820177772363448_n

This is seriously one of my favorite recipes. It’s a staple in our menu rotation. I get asked to make this a lot. When I started making this my husband refused to eat regular spaghetti! I hope you enjoy and this becomes a staple for your family as well!

Courtney

A Dairyman’s Wife

Tater Tot Casserole

This is one of our households favorite meals. It’s such a good comfort food, and it’s incredibly filling. Since it’s been so chilly and rainy here the last week I decided it was a great time to make it! It’s a little time consuming but super simple to make. Serves : 4-6 Ingredients: 1 – 1 1/2# Ground Beef 1/2 Large or 1 Medium/Small onion Chopped * Optional 2 Cans Cream of Onion Soup (You can use mushroom if you want, but a guy we’ll call the man upstairs, who is our farm hand is ‘deathly’ allergic to mushrooms, so I have to improvise, But I will say Cream of Onion has SO much more flavor than Cream of Mushroom, I don’t think I’ll ever go back. I have only been able to find Cream of Onion at 1 of our local stores, I can’t even find it at Wal-Marts, so you could have problems finding it) 1 Can Cream of Chicken with Herbs, or just plain Cream of Chicken (again a flavor thing for me)PART_1435694062252_20150629_202258 1 can of Evaporated milk, or a splash or so of milk to make the mix more soupy 2 – 2# bags of Tater tots 2-3 cups of whatever kind of shredded cheese you like, Colby Jack works well, but sometimes I like a little kick so I add 3 Pepper Cheese Directions: Preheat your oven to 400 Degrees First brown your beef (and onion if using), I would leave the juices in the bottom of the pan because this can be a dryer dish if you don’t mix the soups just right. Dump it into a 9×13 casserole dish Mix your 3 soups and milk together in a medium to large bowl, you want a nice soup consistency so add milk as needed, so their aren’t any or many chunks in the soup. Cream of onion is a REALLY thick soup.PART_1435694066031_20150629_202234 Add both bags of tater tots to the top of your beef in the pan in a nice even layerPART_1435694060941_20150629_202715 Pour the soup mix over the tater tots as evenly around the entire pan as possible, If you have enough milk it should coat the tater tots as well as sink through to the meat, If not just mix it up and coat the tater tots as evenly as possible with the mixture.PART_1435694064493_20150629_202822 Put it in the oven for 40 minutes With about 10 minutes left to bake pull it out and add on the cheese Take it out and enjoy! *You can always add veggies to this and make it like a simple version of Shepherds Pie, great way to hide veggies for your kids! Or non-veggies liking husbands 😉     PART_1435694058671_20150629_211945 (1)PART_1435694057389_20150629_212755

Homemade Chicken Pot Pies

Such a good fall or winter comfort meal, it really is. Warm, delicious and simple to make. I could never find a recipe I liked on the internet, so while wondering the aisle of the grocery store I thought of what was in my favorite pot pies and what I needed to get there. I’m ready for it to be Fall, and last week was fair week so we really needed a good home-cooked meal.

Serves: 3

What you need:

3 – Pie Pans (I just use the $1 throw away pans, but I use the cake pans because they are deeper, more room for good things!)
image

2-3 – Big Boneless Chicken Breast(Cooked & Shredded) Roughly 1 breast per person you figure if you are making more than 3.

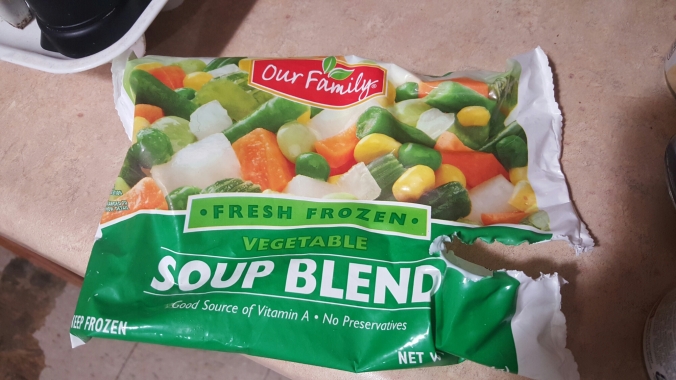
1 – Package Frozen Soup Veggies(Or whatever mix you prefer)
image

2 – Cans Cream of Onion Soup – This is by far my favorite cooking soup EVER, I use it for everything. The Guy Upstairs is also deathly allergic to mushrooms, so that makes Cream of Mushroom Soup out.
image

1 – Can Cream of Chicken w/ Herbs – if you can find it. Cream of Onion is thick, so the Cream of Chicken thins it out and still adds flavor (again roughly 1 can of soup mix you figure per person.)

3 – Packages of Pie Crust (2 crusts each)

Directions:

Precook your chicken breast in the oven at 350, for however long until its cooked through, normally 30-40 for my oven, unless its frozen.

Shred your chicken and put it in a bowl

Preheat oven for 400

Take your pie crust out of the Fridge and out of their boxes, set aside (if they are room temperate they aren’t as brittle and easier to work with)
image

Mix in all three cans of soup

Mix in your veggies
image

Place the bottom pie crust in all of the pie plates
image

Fill all three as evenly as possible, I make my filling about level with the top of the pie plates
image

Place the second crust on top & roll the edges like normal pie edging

Cut 3 or 4 steam holes in the top
image

Since the throw away pans are flimsy I always put my pot pies on baking sheets

Pop them in the oven for about 35-40 minutes, or until the tops are nice and golden, my oven heats unevenly so halfway through i switch my pans around.
image

Let them cool! We always burn ourselves because we’re impatient.

I can normally eat about a half of one of these because they are a good size, Farmer normally can’t finish one, unless he’s had a very long day! I hope these become a favorite of yours as well!

Enjoy!

~Courtney
A Dairymans Wife